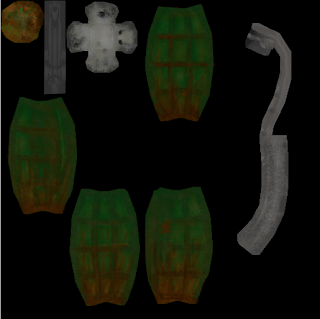
As of now, i have been texuring my grenade the most as it was the first object i unwrapped. So looking back to my story for the grenade, i was trying to pick out parts i could add into the texture to give it some backstory from just looking at it.
As it had meant to have been in a case for the past 2 years, i wanted to make it show that it was old looking and had probably seen better days. To do this i was going to add mud marks, scratches, dust and dark dirty paint. Once i had the grenade unwrapped and the cluster on photoshop, i started to select certain areas in different layers to edit them separately. I did this using the pen tool and selecting points around the parts of the grenade I wanted to edit separately, which was each side of the grenade including the bottom, and then all the parts of the tag. Now that all parts of the grenade were split into different layers, i could start texturing and editing.
I chose a dark green for the initial grenade colour and then started to use different brushes as well as adding effects to get a better looking texture. I started using very light strokes of gray over the grenade to give it a dusty and mucky feel by lowering the opacity and then raised the opacity again to add mud to the grenade, This time changing the brush colour to different shades of brown and slowly painting on the effect.

